Buying larger pieces of furniture can get expensive. Getting one with a specific design and style makes it even more guaranteed to break the bank. I am loving the industrial and rustic look right now. It can fit in well with any style if done right. I was looking to add a console table to my home and decided to make it myself. I did not use any told but a screw driver for this project. So absolutely anyone can make this!


To begin with I decided on a industrial style one, and am using galvanized pipes for the legs of the table.
The supplies I purchased for this are:
- Four end caps
- Four 24 inch pipes
- Six T shaped pipe connectors
- Four of the floor mounts (will connect the legs to the bottom of the table)
- Two 8 inch pipes for the front legs
- Four 5 inch pipes for the back legs and the middle pipes connecting the legs
- Two 1 1/2 pipes
- One 36 inch pipe
- One 48 inches long and 11 inches wide

The whole table ended up being 35 inches tall, so just shy of three feet. I think with console tables the height can really differ. Each person will have varying preferences with heights. Remember I told you there is no cutting happening. So I was able to take the un-treated (there is no finish to the wood) piece of pine wood and stain it right away.

I used a walnut color stain with the polyurethane in the stain itself. This way the stain and table have a coat of protection without me having to do more steps. Be sure to wear gloves, and protect the surface that you are staining the wood on. The stain will stain anything, including skin and carpet. Take a soft cotton cloth and dip it in the stain.

Get it nice and saturated. Wipe the stain on the wood, going from side to side with the grain of the wood.

You will be able to see how the stain is setting in the wood, and if it needs to be rubbed in more by the streaks. It will have a wet and darker appearance until the stain has been rubbed into the wood.

Any dripping or lines that happen during the staining process, just wipe away quickly and rub them into the wood. I did two coats of the stain because it appeared a little lighter with the one coat.


Once both sides of the wood was stained I turned the wood on the side and stained the sides. Using the same technique, just less stain on the cloth.
I also spray painted the pipes a black color. It helps the pipes stand out against the wood, giving a pop of contrasting color. Once all was dry it is time to build the leg’s for the table. I will let the pictures do most of the talking for these next steps. It can sound a lot more confusing than the process actually is.

To connect the pipes is as simple as screwing in the pipes with the allotted grooves.


With the table legs connected and sturdy it is ready to hold the table top.


Set the table top down flat, and set the legs upside down on top of the wood. Making sure the legs are situated in the center of the wood. Then screwing into the holes in the top of the legs with a simple screw driver.

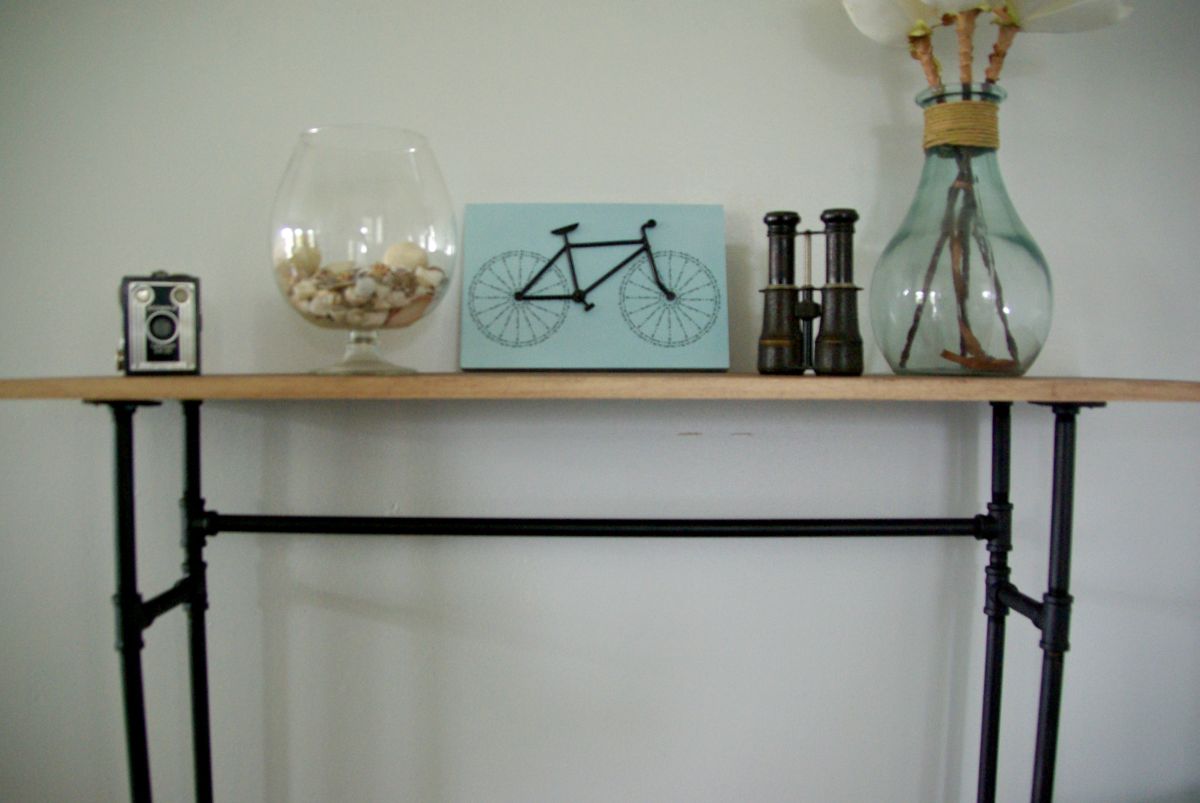
That is it! I now have a beautiful rustic and industrial console table.


With the simplicity of the wood and the stark contrast of the lighter wood and the dark legs it can work well in a contemporary or modern space along with a country and rustic space.

It is all in the finishes to set the tone for the console table. Allowing decorations to be displayed in a way to not overwhelm a space.


Because of the thinner design of a console table it allows a larger scale piece of furniture to work without needing a large scale room to put it in. This can fit against a wall that has lots of foot traffic going past it without getting in the way.

I know that some people can become overwhelmed when you see furniture ideas and how they are DIY. But this one truly is DIY friendly for anyone, no large told were needed, or more skill than wiping the stain on the wood. I am so happy with the table and what it brings to the space, and very happy with the simple process it was to build it.


You’re reading How To Build A Rustic Table Using Galvanized Pipes , originally posted on Homedit. If you enjoyed this post, be sure to follow Homedit on Twitter, Facebook and Pinterest.
The post How To Build A Rustic Table Using Galvanized Pipes appeared first on Home Decorating Trends – Homedit.
via. Home Decorating Trends