Copper is one of the hottest metals being used in design these days. It’s everywhere, in all rooms, in all amounts. While it might seem a little intimidating to attempt a DIY project using metal, this one is a fast and easy way to get started. Truly, you can start and finish your own custom copper magazine rack in no time at all. As far as DIYs go, this one is very satisfying…especially if your living room is in desperate need of a clean-lined, understated spot to stow away your magazines and other reading materials!
DIY Project: Copper & wool felt magazine holder, 20”w x 7”d x 16”h
DIY Level: Beginner
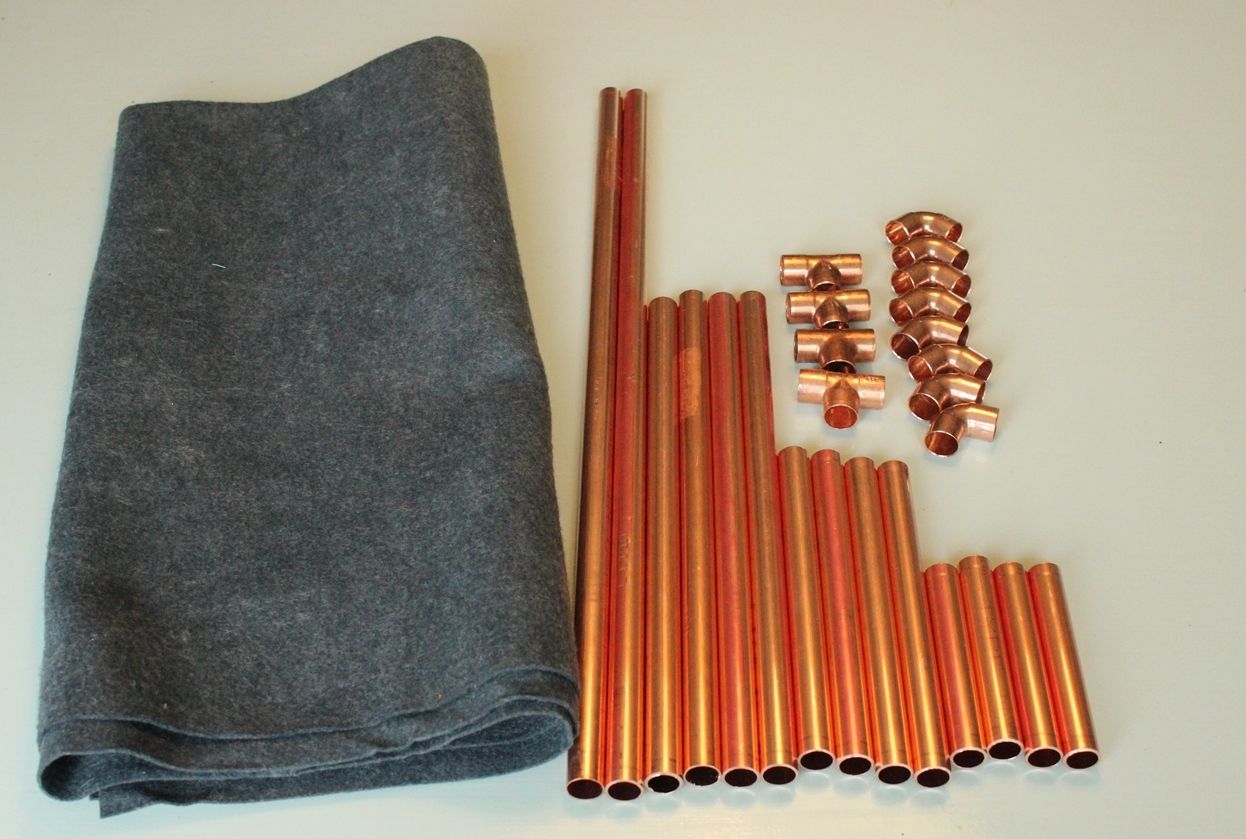
Materials Needed:
- Two (2) 1/2″ copper pipe, 20” long
- Four (4) 1/2″ copper pipe, 12” long
- Four (4) 1/2″ copper pipe, 7” long
- Four (4) 1/2″ copper pipe, 4” long (Note: 10’ and 2’ lengths of 1/2″ copper pipe will provide all of these pieces, with a little bit left over.
- This was the most cost-effective method I could calculate.)
- Four (4) 1/2″ copper Ts
- Four (4) 1/2″ copper Ls
- 36” x 18” piece of wool felt
- Metal glue – not shown (optional but recommended)

Step 1: Assemble copper frame. Start by adding Ls to both ends of your two 20” and two 7” pipes. Add the middle part of the Ts to both ends of your last two 7” pipes.

Add your four 4” pipes to the Ls attached to the 20” pipes. Set aside.

Add your four 12” pipes to the Ls attached to the 7” pipes.

Connect the 7” pipes with Ts to the ends of the 12” pipes that you just added.

Connect your 20” segments to the Ts, so that you end up with a frame.

Step 2 (optional): Glue PARTS of your copper frame together. If your pipes fit snugly into the connector pieces (e.g., the Ts and Ls), then you can skip this step and move on to Step 3. But if your frame is a bit wobbly and loose, you’ll want to secure the connections with some adhesive appropriate for metals. I used Loctite GO2 Gel.

Squeeze a bit of glue on the inside rim of any connector pieces that are loose, then twist and secure the pipe ends inside. IMPORTANT: DO NOT GLUE YOUR 20” PIPES OR THE ADJACENT L CONNECTORS YET. You need to be able to remove the 20” pipes to add your felt magazine holder, so it’s important that these pieces can come off at this point.

Step 3: Sew your felt magazine holding piece. Fold over the short end of your 18” x 36” piece of wool felt 1-3/4”. Pin this fold every couple of inches all the way across.

Sew a double seam about 1/4″ from the “raw” end of your folded-over felt. To do this with a basic sewing machine, simply sew one seam, cut threads, and go back and sew another seam very close to the first.
Repeat Step 3 on the other short end of your felt piece.

Step 4: Assemble final pieces. Slide your 20” pipes through the felt seams, then secure the pieces with your metal adhesive (if needed). Take care to keep glue off your wool felt. Set up your magazine holder squarely against a wall and let adhesive dry and harden completely, up to 24 hours.

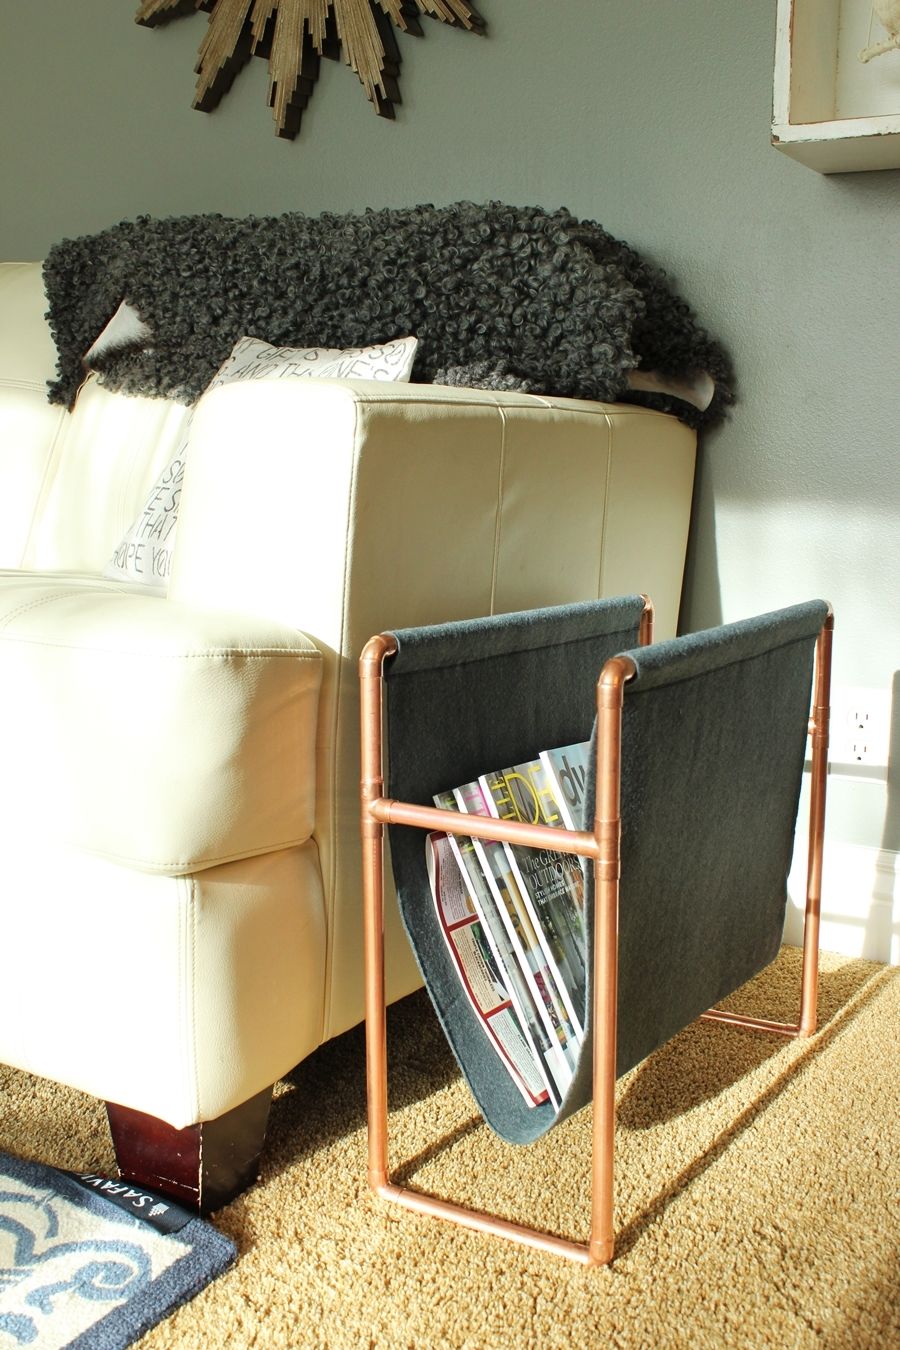
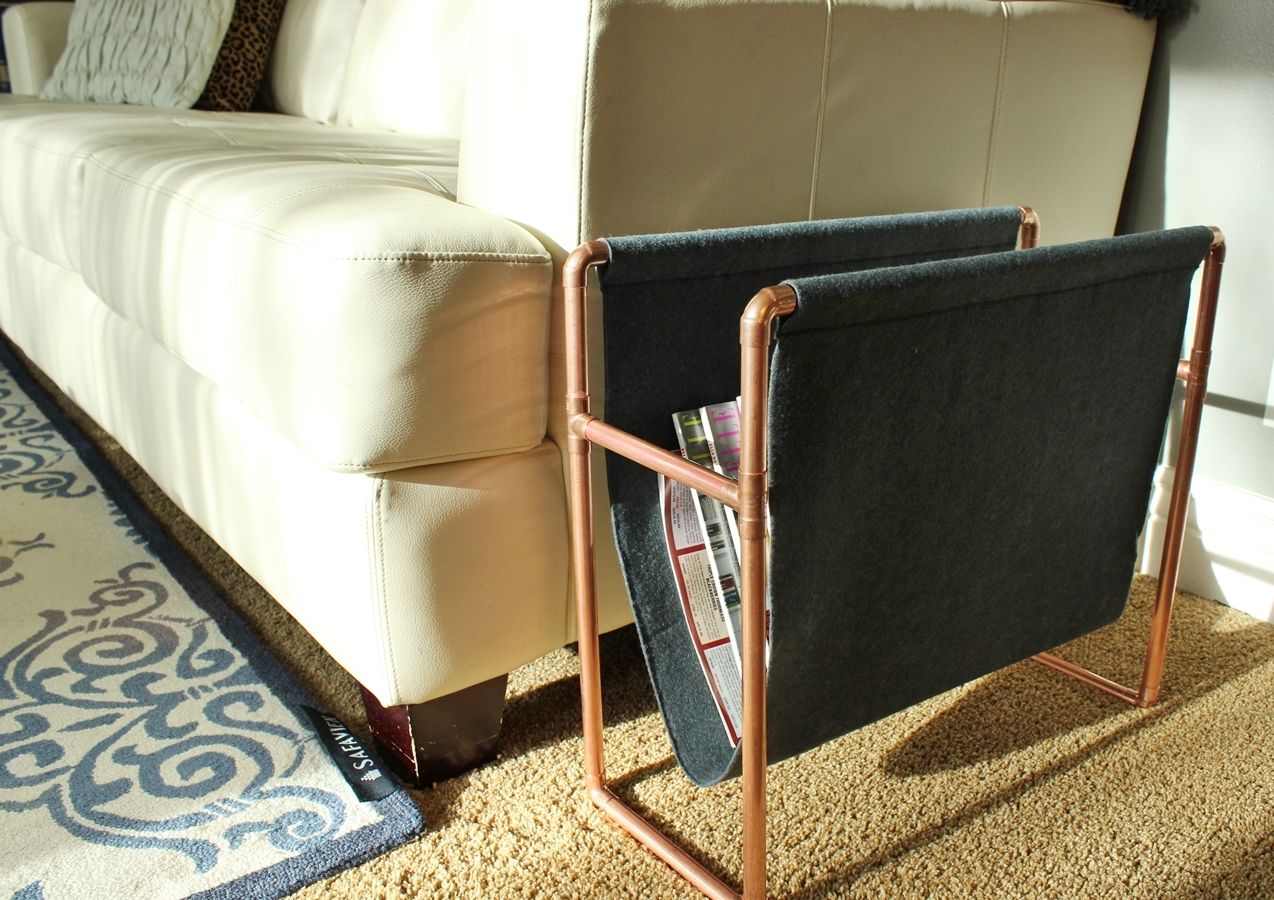
Step 5: Load with magazines and place next to the sofa. When the adhesive has completely set and dried, you’re done!

We think it looks great – simple and classic – next to a living room sofa. But wherever you choose to put your copper magazine holder, we think you’ll be pleased.

Enjoy your stylish new organizational system!
You’re reading Chic DIY Copper Magazine Holder: How to Make this Surprisingly Easy Piece , originally posted on Homedit. If you enjoyed this post, be sure to follow Homedit on Twitter, Facebook and Pinterest.
The post Chic DIY Copper Magazine Holder: How to Make this Surprisingly Easy Piece appeared first on Home Decorating Trends – Homedit.
via. Home Decorating Trends
