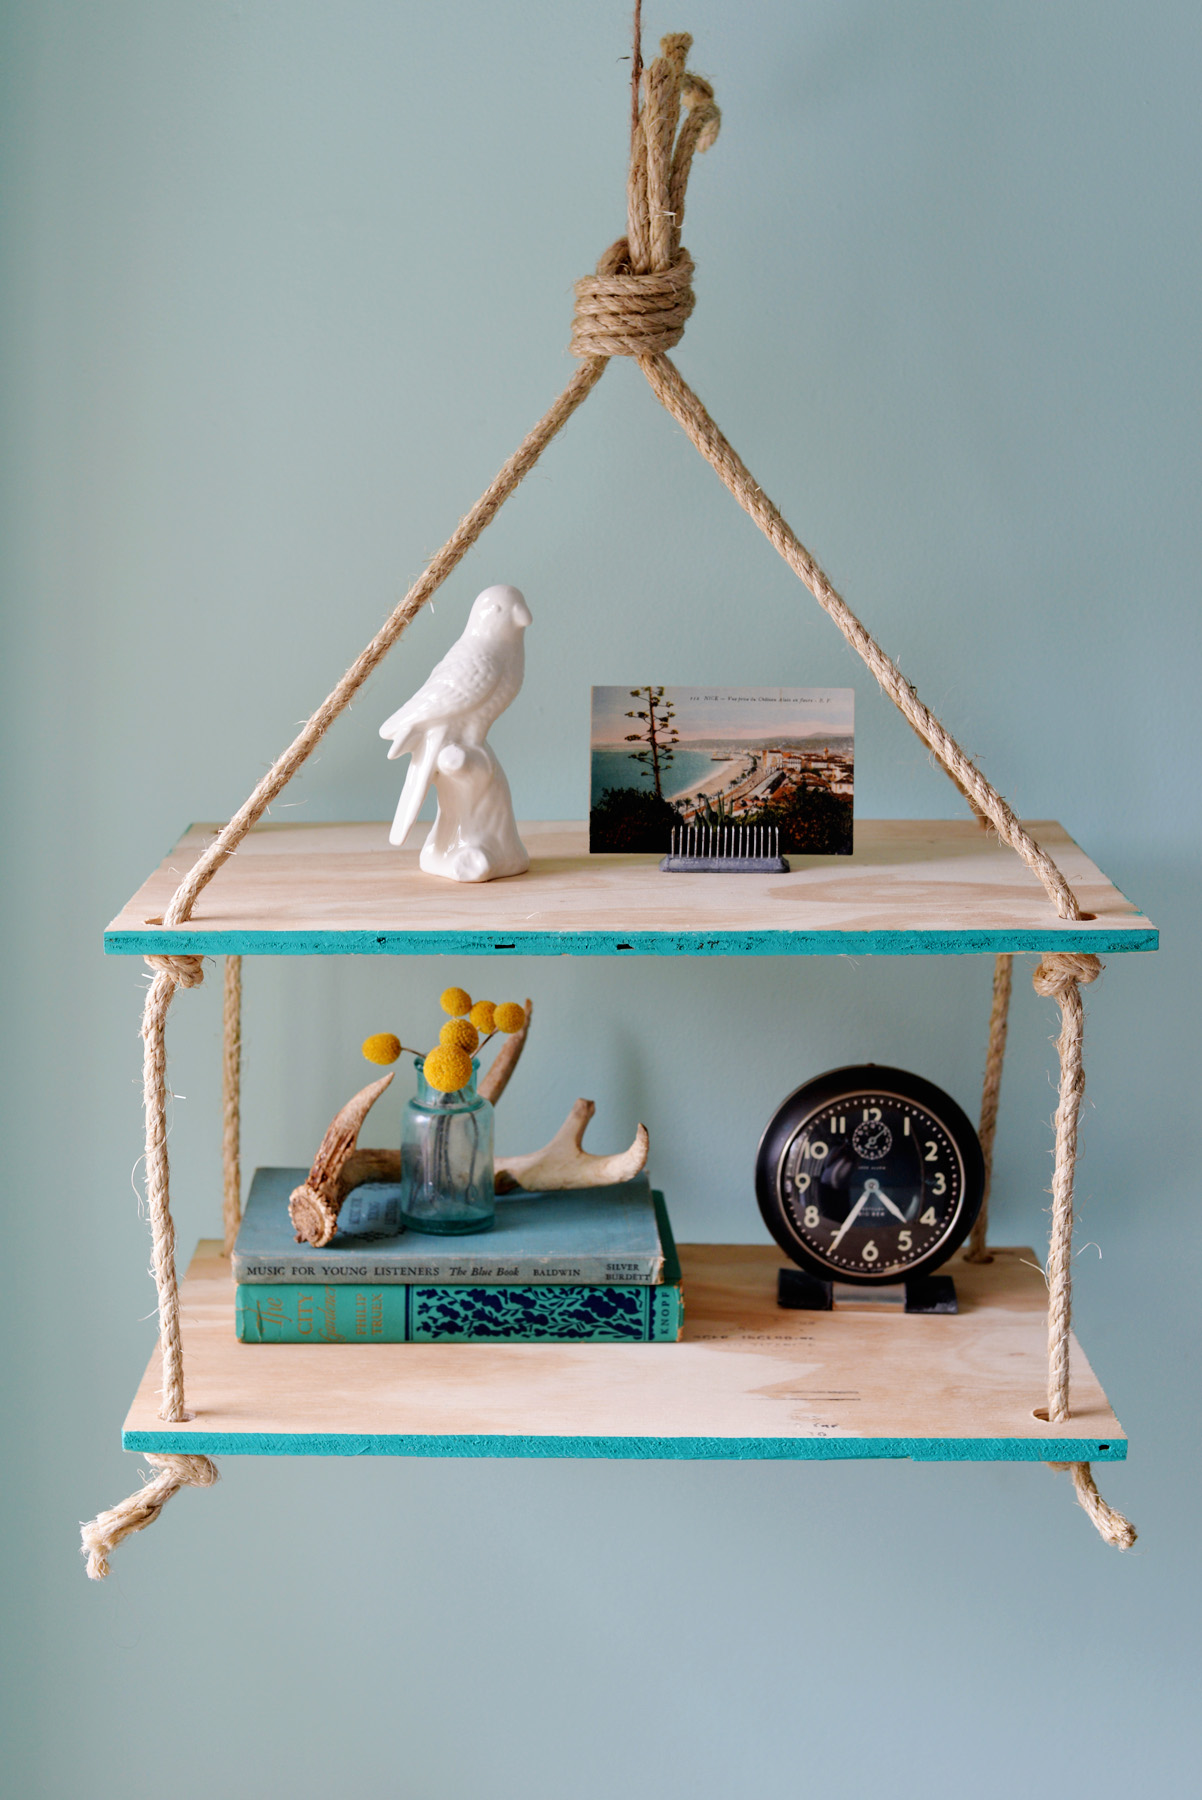
Add something extra to an empty corner or wall with this hanging rope shelf. Avoid multiple holes in the wall by hanging this from the ceiling from 1 simple hook against the wall to display your favorite items. Perfect for renters or those that like to change up their decor often and get tired of putting holes in the wall!

Supplies:
- drill or drill press
- 5/8 inch drill bit
- thick rope
- heavy duty scissors
- clamps
- paint
- paint brush
- 2 rectangular pieces of plywood cut to desired measurements

Instructions:
1. Start by prepping your wood. The 2 pieces of plywood that you use should be equal in size. You can cut them down yourself with a table saw or have them cut down for you at the hardware store. Sand down the sides if needed.
2. Stack the two pieces of wood on top of each other and use your clamps to clamp them together.
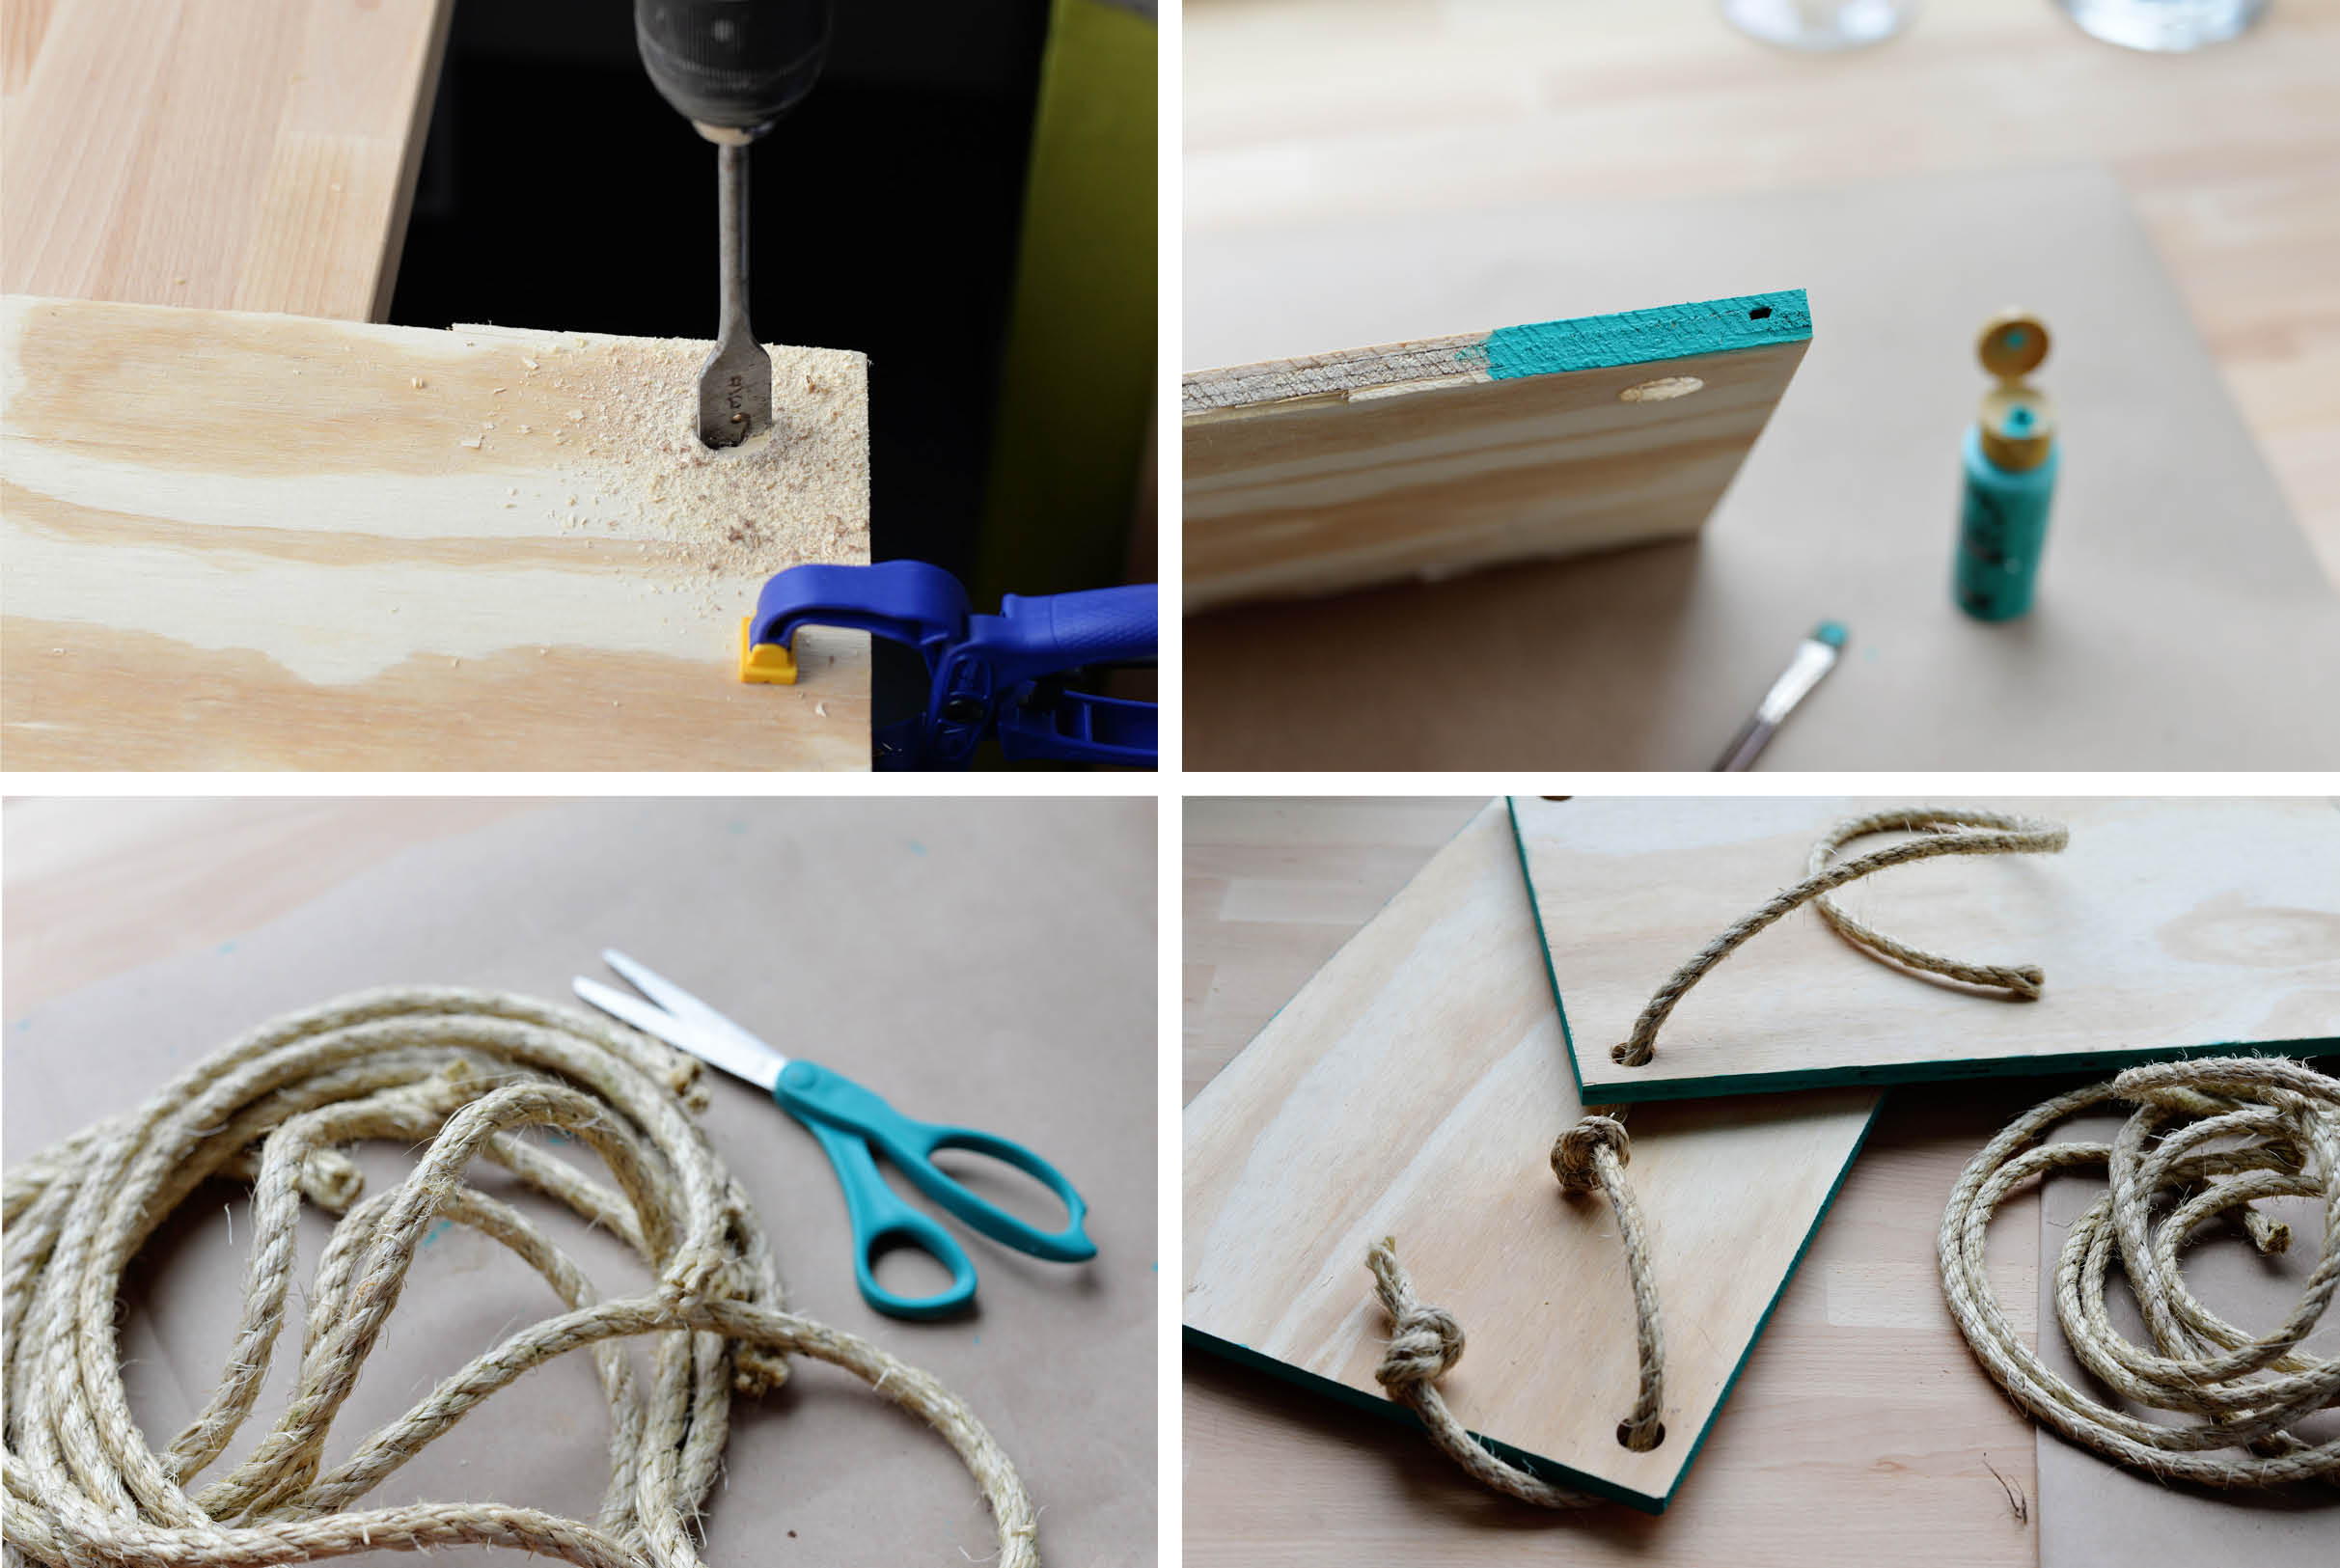
3. Once you have clamped your wood into place, use your drill with a drill bit large enough to accommodate the width of the rope that you are using to make a hole in each corner. Here we used rope that was approximately 3/8 inch thick so we used a 5/8 inch drill bit to make the holes.
If you find it too difficult to drill through both pieces at one time, carefully measure and mark all the holes in each corner for each board and drill them one at a time. You want to make sure that your holes line up closely one on top of the other so that your shelf is straight.
4. Once your holes are finished, paint the edges of the wood a bright and fun color. This part is totally optional and you can get creative here. You could paint the entire piece of wood, just the edges, or leave them plain. Totally up to you and what will look good with your decor!
5. Next cut 4 pieces of rope equal size. You will likely want to cut them on the longer side, approximately 4-5 ft each to give enough slack for the knots and hanging down from the ceiling. This measurement will depend on your ceiling height and how far apart you want the shelves so determine this first before cutting.
Remember you can always cut the rope down if needed but you can’t add on any extra slack, so better to make it too long than too short!
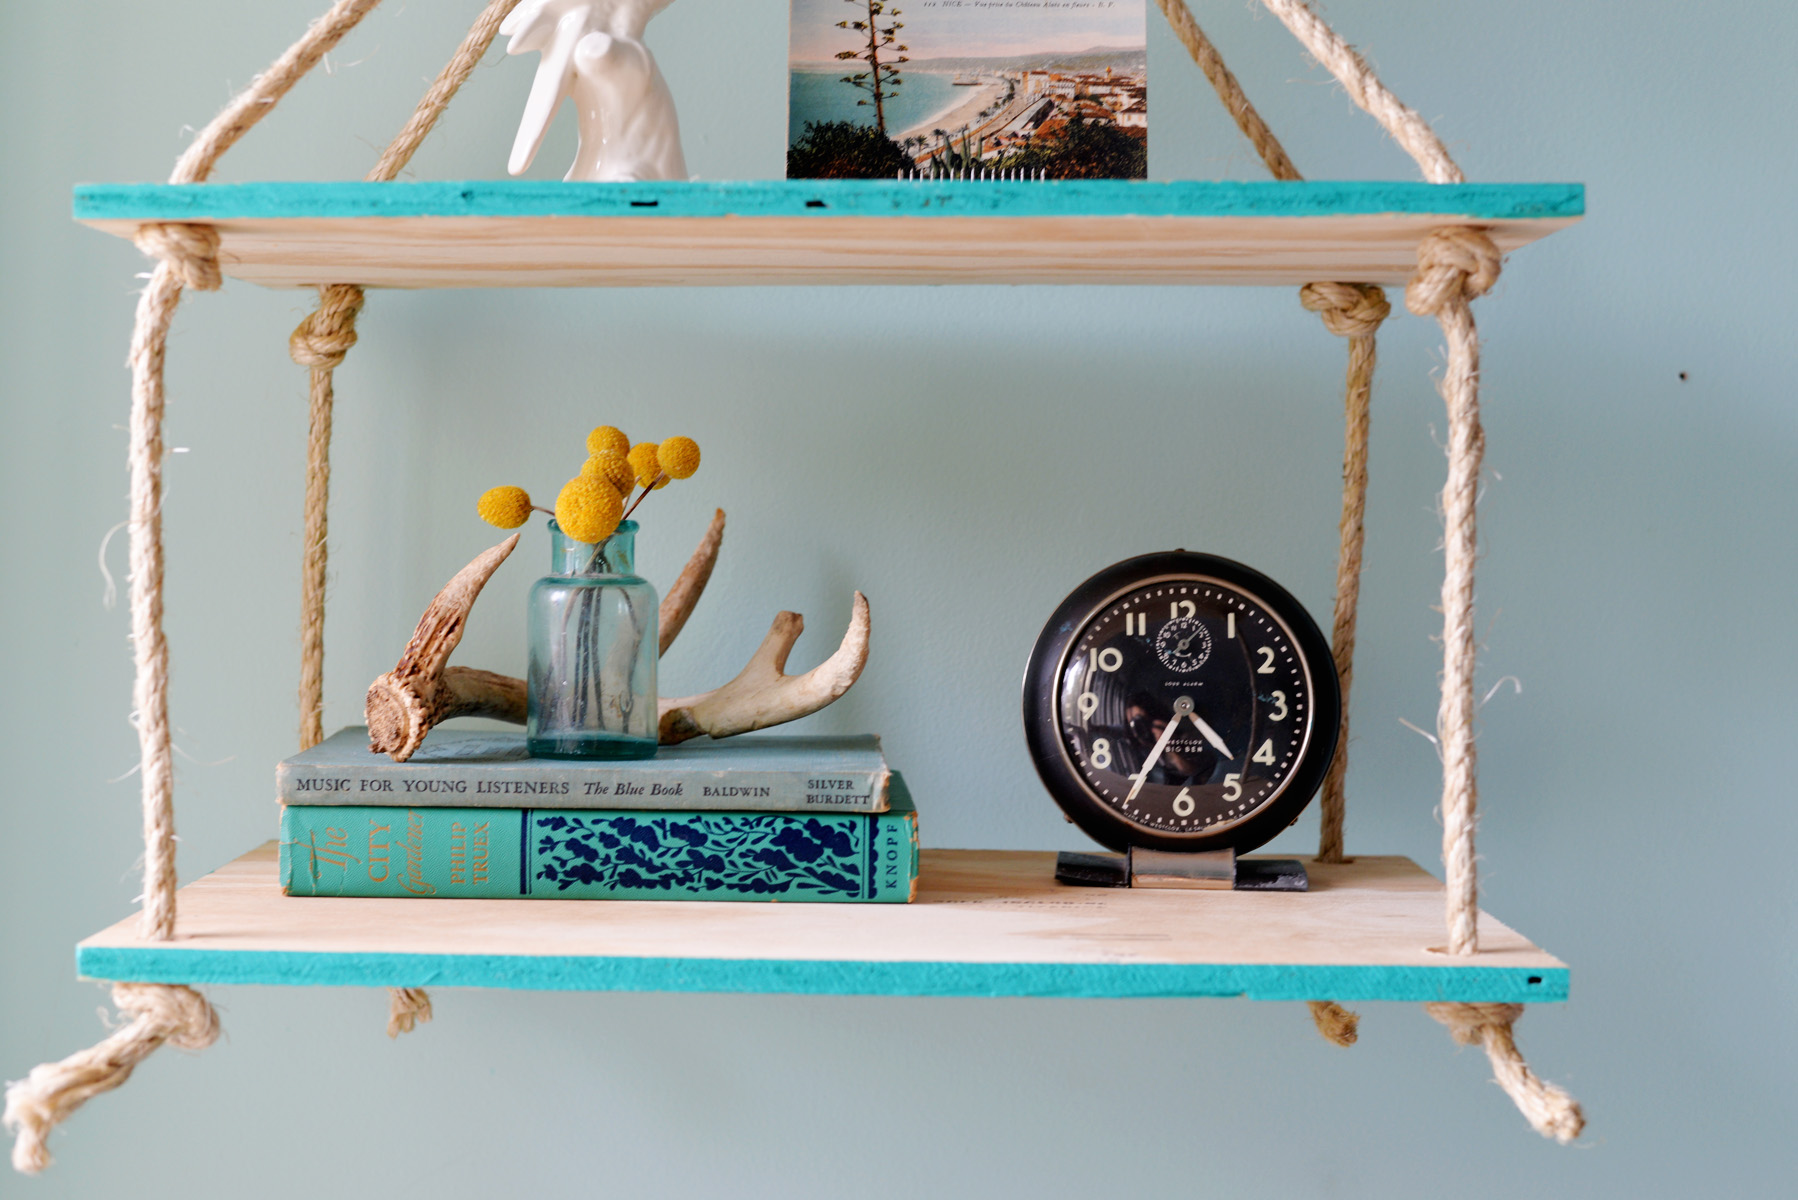
6. To assemble the shelf, tie a knot at the end of each piece of rope and thread through the bottom shelf. Tie a second knot at the location where you would like your top shelf to lie. Measure this distance and repeat for the other 3 pieces of rope. Try to keep the knots spaced as evenly as possible to keep your shelf straight.
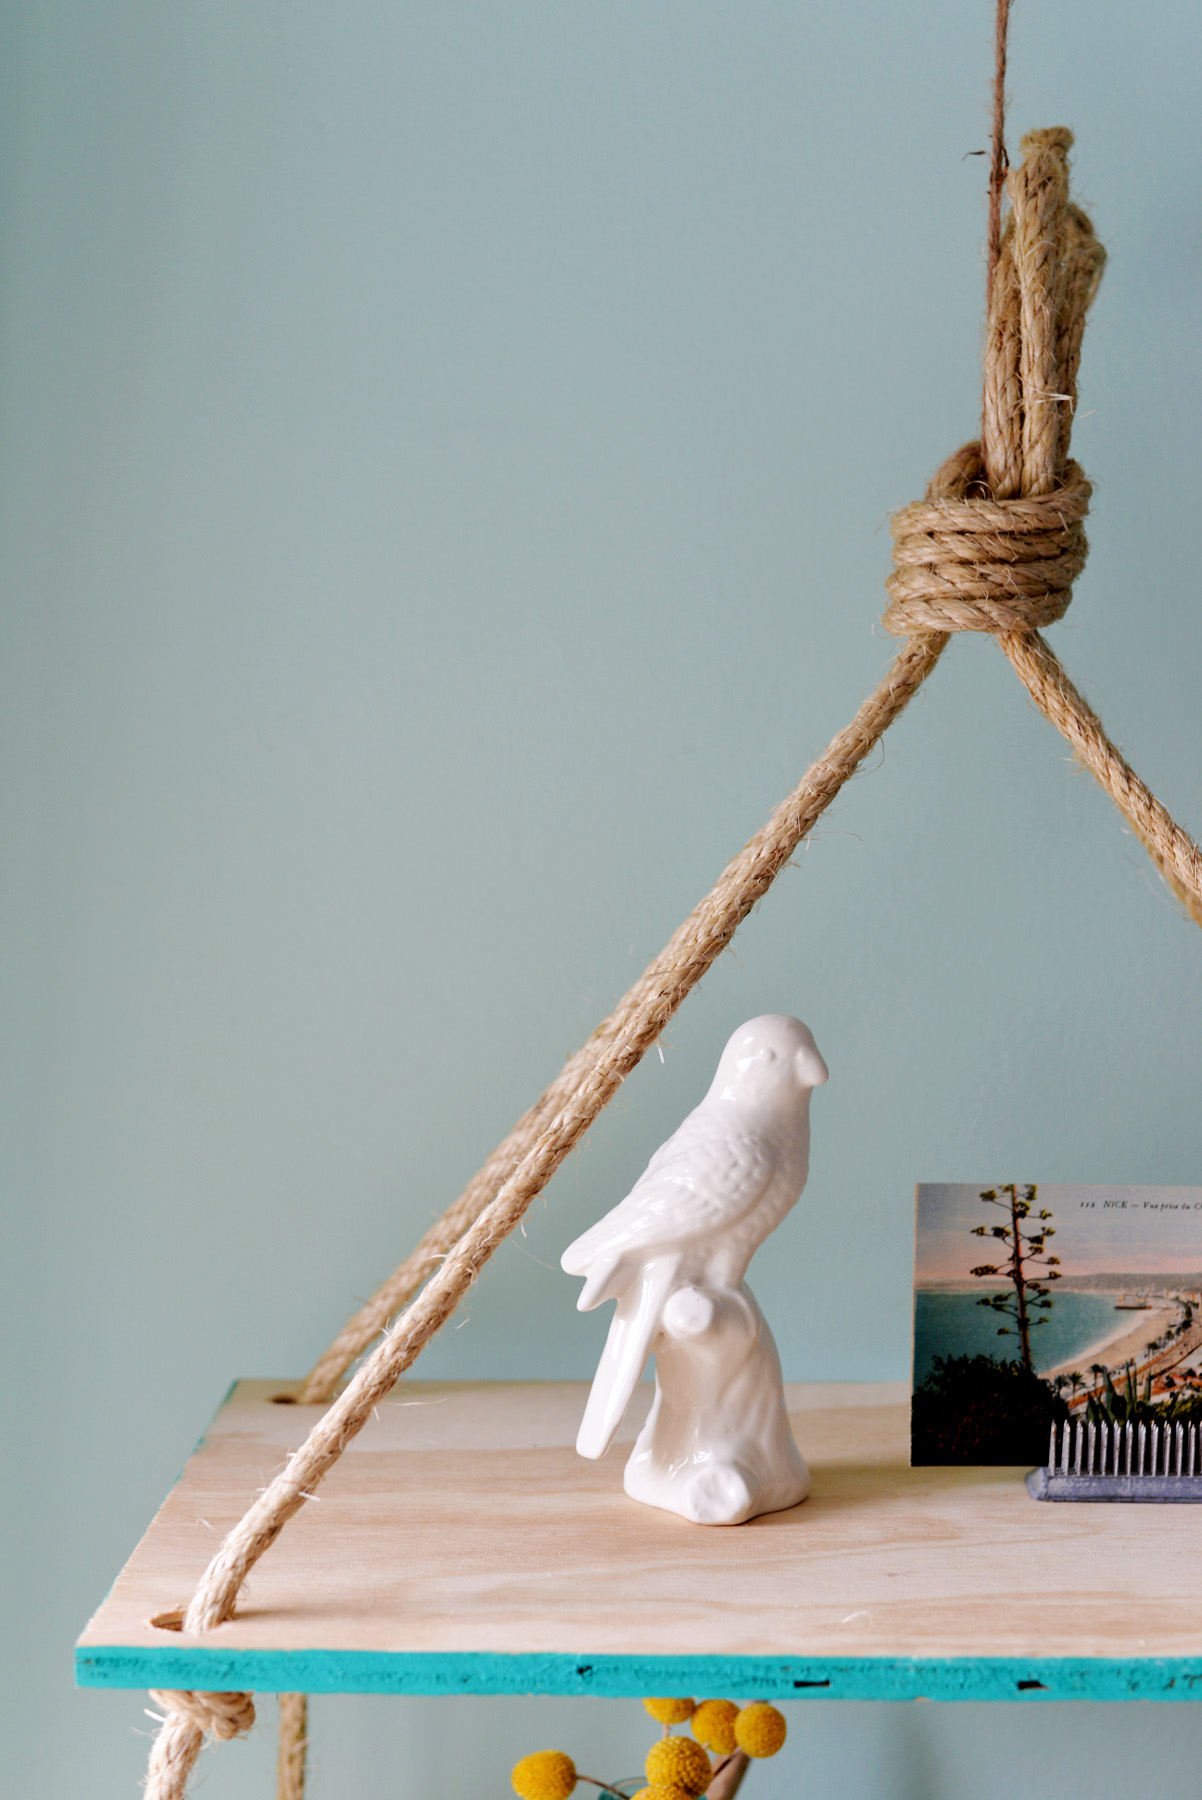
7. Lastly take all the excess rope at the top and tie a knot. If long enough, you can hang this directly from the ceiling for your shelf. If not, you may want to add extra rope or twine to hang.

When hanging your shelf hang close to the wall so that it does not spin around. Likely you will hang it from a hook in the ceiling. If you have a very long hook you can also try hanging it off the wall as well. Stage with the items you would like to store and your project is complete!

You’re reading DIY Hanging Rope Shelf , originally posted on Homedit. If you enjoyed this post, be sure to follow Homedit on Twitter, Facebook and Pinterest.
The post DIY Hanging Rope Shelf appeared first on Home Decorating Trends – Homedit.
via. Home Decorating Trends
